Silhouette Savvy Series – One cut file, multiple ideas –
3layouts altered cut file Design Team projects different looks Free cut files From around the Web general Inspiration Nathalie DeSousa Nerd Academy new collections New products one cut file Scrapbook & Cards Today magazine Scrapbooking silhouette Savvy Series Tips & Tutorials

Hello Crafty Friends!
I hope you all are doing well, and enjoying the beautiful colors that are popping here and there after all those April showers (even though our part of Canada has been hit with lots of rain in May, also!).
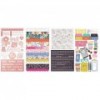
This month I wanted to show you how versatile cut files can be, and how you can use the cut file in different projects just by altering it a bit. For this post, I am using the Scrapbook & Cards Today magazine free May 2017 cut file.
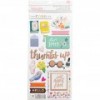
Scrapbook and Cards Magazine free May 2017 cut file
- I was blessed to be this month’s SCT guest cut file designer, and got the opportunity to play with the cut file, so the first layout created features the cut file as it was designed.

By simply rotating the original image, I was able to frame a large picture of my sister and her little ( i used Simple Stories Faith collection for this layout)


- The second layout created with this cut file features the flower ring as part of the layout’s mat, here is how I altered the cut file:

After highlighting the entire image, click on the modify window, and chose ” RELEASE PATH”. This is how the image will look like after the command was been activated.

Click,and delete all the images that are attached to the outer ring of the cut file. Make sure that the rest of the image remains unchanged. I have moved to the side all the pieces that were deleted from the image

Once again, highlight (drag the mouse over) the entire image; make sure all the small images are included in the highlighted square. This is how the image would look like after the highlight

After highlighting the image, click on the “MAKE COMPOUND PATH” on the Modify window, or right click menu. The image will look like the original cut file without the outer edge of the ring.
Here is the layout created with this altered cut file. I chose to balance the page by adding fussy cut flowers to match the ones in the ring, and a large picture that fit inside the flower ring.


- For the last alteration, I decided to create an entire ring of flowers within the layout’s mat. Here is how the cut file was altered:

Copy and paste an image of the cut file ( as used in the second layout). Make sure that each ring is a Compound path.

Rotate the ring until the entire inside perimeter of the ring is covered with flowers. It is important that you make sure each flower ring is a COMPOUND path (on its own). The ending leaves of each side of the ring will overlap.

After lining the two floral rings so that the perimeters overlap completely; highlight both images, click on the Modify window, and pick the INTERSECT option. The image will look like the picture -each little segment will be individually highlighted –

Highlight the entire image, and using the Modify window, click on the MAKE Compound path command to create the floral ring
For this project, the image was cut, and then all the cut outs were backed with papers from the Lovely Day collection. The entire ring was then backed with vellum, and a light green paper from my stash.

A bit of hand stitching adds texture to the page, but also secures the layers together. A bit of foam adhesive under the flowers, helps to add dimension to this page, also. I added a small picture of my daughter to the background, and took advantage of the rings empty middle space to add embellishments, Here is the final layout:

So there you go! Cut files are so versatile, just a few little alterations are enough to change the look of the original cut. There are still so many more opportunities with the cut file, Next time you want to use a cut file in a page, consider altering a bit of the image, this will give you a truly one of a kind page.
I look forward to see how you can alter a cut file. Remember I am a comment away, if you need assistance with any of the steps shown,
See you all soon!


https://static.inlinkz.com/ppr.js
← Older Post Newer Post →